Welcome to the world of axolotls, unique amphibians that require special care to thrive in captivity. A crucial aspect of maintaining a healthy axolotl aquarium is understanding and managing the nitrogen cycle. This guide aims to provide comprehensive insights into the crucial aspect of axolotl care – nitrogen cycling in their aquariums. A properly nitrogen cycled tank is vital for maintaining the health of axolotls.
Table of Contents
What is Nitrogen Cycling?
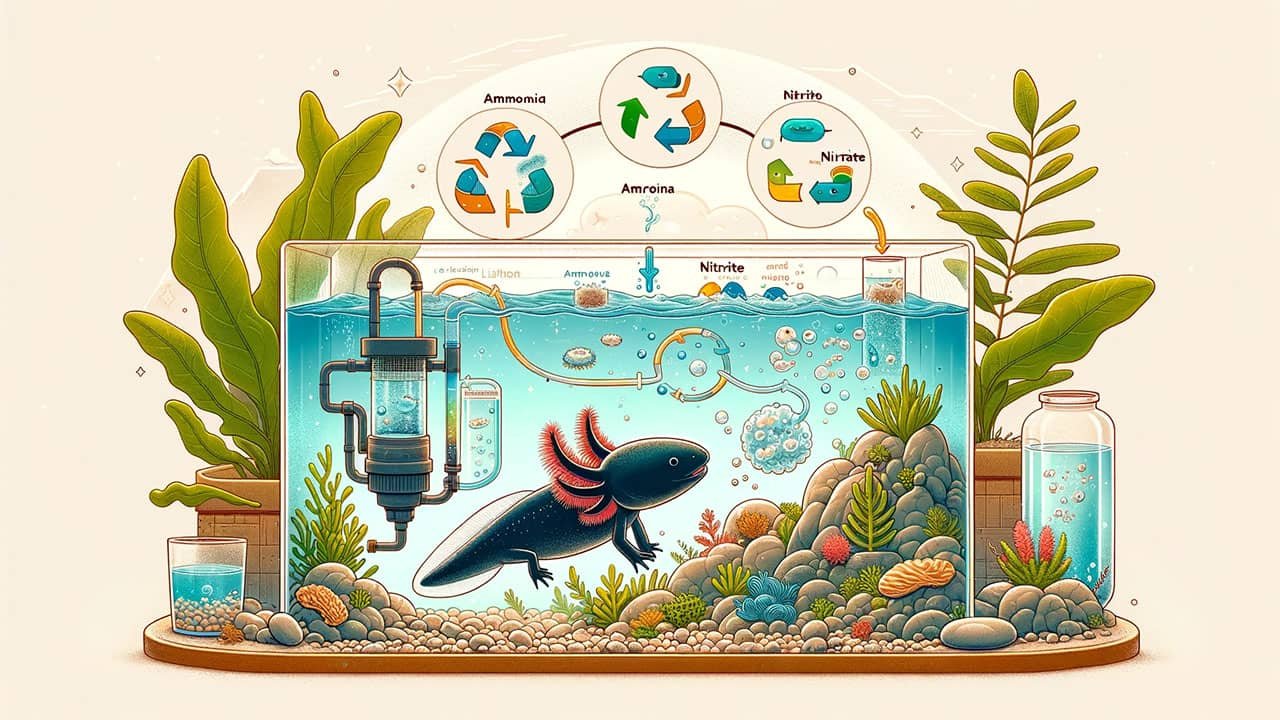
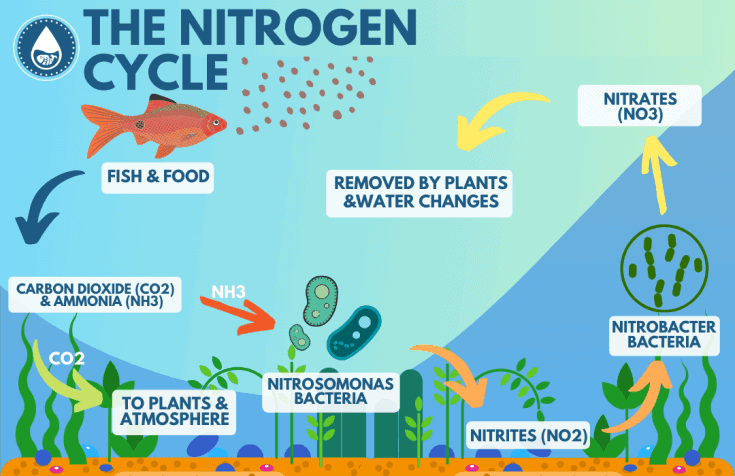
The nitrogen cycle is a fundamental ecological process in aquariums, transforming harmful harmful ammonia into less toxic nitrates. It begins with ammonia, produced from axolotl waste, which is then converted into nitrites and finally into nitrates by beneficial bacteria. Understanding this cycle is crucial for preventing the buildup of toxic substances in the aquarium, which can be detrimental to axolotls.
Detailed Explanation of Nitrogen Cycle With Steps
A well-established aquarium boasts a robust colony of nitrifying bacteria in the filter media and/or substrate. These bacteria are crucial for removing ammonia and nitrite, effectively cycling the nitrogen in the tank to keep your axolotls healthy and safe.
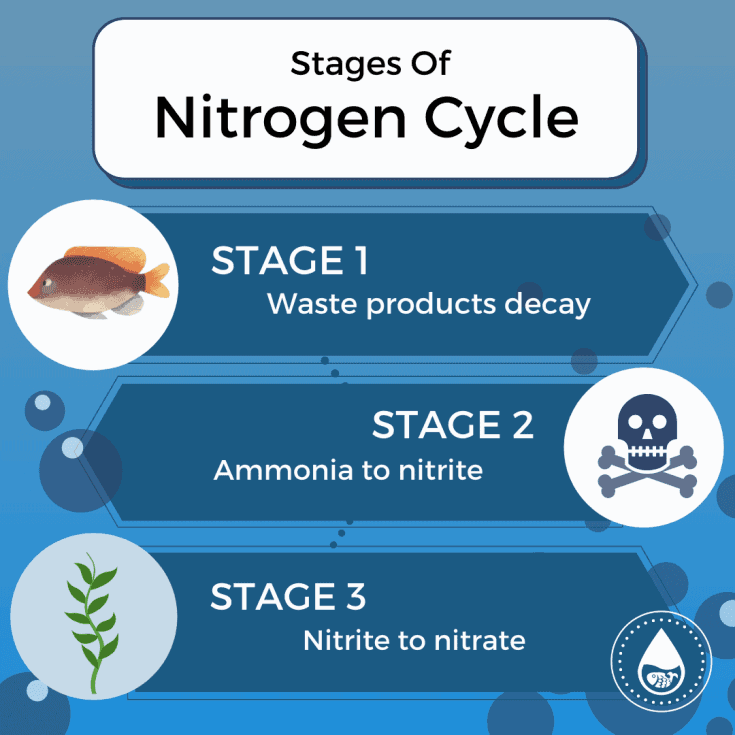
The nitrogen cycle works through three main stages in marine ecosystems:
- Ammonia (Bad)
- Nitrites (Bad)
- Nitrates (Good)
Ammonia
This stage kicks off with the breakdown of organic waste, including urine, poop, and uneaten food. These substances release ammonia as they decompose, courtesy of scavenging bacteria.
This ammonia dissolves in water, forming ammonium. It’s common to use ‘ammonia‘ and ‘ammonium‘ interchangeably due to their chemical relationship. Ammonia (NH3) reacts with water to form ammonium hydroxide (NH4OH), which then breaks down again into water and ammonia gas. This is an equilibrium reaction, depicted as:
NH3(g) + H2O(l) → NH4+(aq) + OH–(aq)
As ammonium hydroxide is a base, it raises the aquarium’s pH. The ammonium concentration will keep rising until there are enough nitrifying bacteria to consume it as quickly as it forms. Regular water testing will reveal when ammonia levels start to fall, indicating that the nitrifying bacteria are at work.
As the population of nitrifying bacteria in the filter and substrate grows sufficient to break down ammonia as rapidly as it’s produced, you’ll notice a steady decrease in ammonia levels. This usually occurs within five to seven days, or even sooner if using a nitrifying bacteria starter culture.
Nitrites
When you notice a decrease in ammonia levels in your tank, it’s typically followed by an increase in nitrite levels. This occurs because the bacteria consuming the ammonia produce nitrites (containing NO-2 ions) as a byproduct. Nitrites are more toxic than ammonia, posing a significant risk to your aquatic inhabitants.
Fortunately, this stage is temporary, thanks to the presence of another type of bacteria known as nitrobacters. These bacteria feed on nitrites, transforming them into a much less harmful substance: nitrate (NO-3). As nitrite levels rise, these nitrobacter bacteria multiply rapidly, effectively converting nitrites into nitrates.
Nitrates
The increase in nitrates marks the final phase of the Nitrogen Cycle in your aquarium. This stage indicates that your tank’s nitrogen cycle is well-established, leading to a significant decrease in ammonia and nitrite levels, eventually reaching zero.
When this balance is achieved, your aquarium becomes a safe and healthy environment for your aquatic pets. This successful establishment of the nitrogen cycle is crucial for maintaining the long-term health and stability of your aquarium ecosystem.
Nitrates (Good – up to a point)
In your aquarium, nitrates represent the final byproduct of the nitrogen cycle. However, this doesn’t form a true ‘cycle’ in the strictest sense, as a cycle implies continuous recycling without an end product. The cycle is completed in natural ecosystems as plants and photosynthetic bacteria absorb nitrates to build proteins and other compounds. These are then returned to the system as ammonia when the plants are consumed, perpetuating the cycle forever. In a typical home aquarium lacking a dense plant environment, this full cycle isn’t achieved, leading to an accumulation of nitrates.
High nitrate levels can be harmful to fish, causing issues like skin and gill irritation. A concentration above 40 ppm is particularly concerning. Regular partial water changes are necessary to manage nitrate levels. For instance, when nitrates reach 30 ppm, replacing about one-third of the tank water with treated tap water can bring levels down to safer values, like 20 ppm.
Also Read: Understanding Axolotl Gill Development and Function
It’s important to change no more than about ⅓ of the water within a week unless in response to a severe problem. Drastic changes in water chemistry can harm the beneficial nitrifying bacteria, potentially disrupting the nitrogen cycle and requiring you to start the process again. Also, remember never to use untreated tap water for replacements, as the chlorine in it can kill these crucial bacteria.
How to Establish the Nitrogen Cycle in Your Tank for Axolotl
The timeline for establishing the nitrogen cycle in your aquarium can vary, ranging from as little as two weeks to up to two months. Essentially, the cycle is complete when the conditions are right. During this period, you can house your axolotl in a plastic tub or a smaller aquarium, ensuring daily water changes to avoid the accumulation of ammonia, nitrite, and waste.
Methods for Establishing Nitrogen Cycle in Aquarium
There are two primary methods for establishing the nitrogen cycle in an aquarium:
- Fishless Cycling
- Fish-in Cycling
Fishless Cycling
This method allows for the establishment of the nitrogen cycle without posing risks to fish. It involves careful monitoring of water parameters and providing the necessary conditions to encourage the growth of nitrifying bacteria.
Fish-in Cycling
This approach uses live fish to introduce nutrients and ammonia, which aid in cultivating nitrifying bacteria. However, it carries the risk of harming or even killing the fish if water quality is not meticulously maintained.
I recommend a hybrid cycling method that I’ve found effective for axolotl tanks. It combines fishless cycling with the introduction of a nitrifying bacteria culture. After initiating the cycle, I add guppies (specifically guppies, not other fish species) to provide the nutrients needed by the bacteria. This approach eliminates the need to add ammonia or other external nutrients manually. For those who prefer a completely fishless cycle, many detailed guides are available online.
For those familiar with traditional fishless cycling, this hybrid method might seem like it skips steps, but it doesn’t. The combination of a nitrifying bacteria starter culture and guppies effectively accelerates the process, reducing the workload and time needed to establish a healthy nitrogen cycle in your axolotl tank.
Essential Supplies for Establishing Aquarium’s Nitrogen Cycle
Following are some of the essential materials required for establishing Aquarium’s Nitrogen Cycle:
- Aquarium Test Kit
- Nitrifying Bacteria Starter Culture
- Dechlorinator
- Healthy Guppies
Aquarium Test Kit
A reliable test kit is indispensable for monitoring your aquarium’s cycling process and maintaining water quality. The API Freshwater Master Test Kit is highly recommended for its accuracy and comprehensive testing capabilities. It includes tests for ammonia, nitrite, nitrate, and pH, offering around 800 tests per kit.
Nitrifying Bacteria Starter Culture
Essential for jumpstarting the nitrogen cycle, these live bacteria cultures are available in various brands. API QuickStart and Tetra SafeStart are two reputable options I’ve had success with. Remember to check the expiration date for the freshest culture, as its effectiveness depends on the bacteria’s viability.
Dechlorinator
Since tap water contains chlorine and chloramines for sanitation, these need to be neutralized. They can be harmful to both your axolotl and the beneficial nitrifying bacteria. A dechlorinator is a must every time you add new water to the tank.
Many products are available, each containing Sodium Thiosulfate to eliminate chlorine and chloramine. Some also include chelating agents for removing heavy metals and buffers for pH stability. Products like AquaSafe Plus or API Tap Water Conditioner are effective choices.
Healthy Guppies
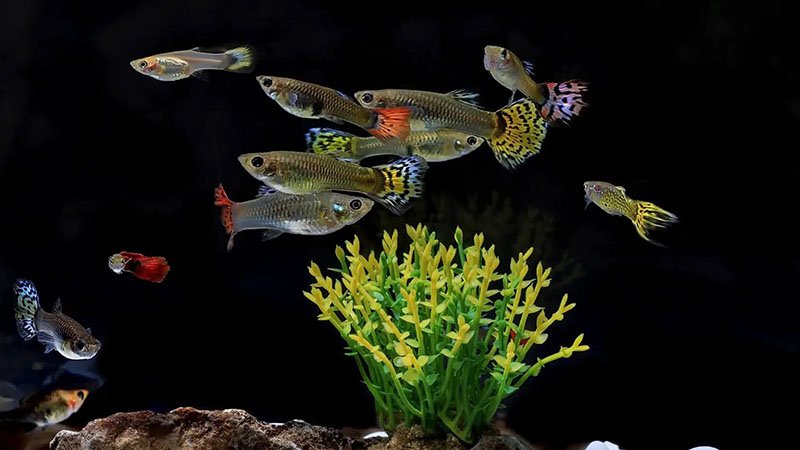
Choose vibrant, healthy guppies from well-maintained display tanks, avoiding overcrowded feeder guppy tanks. Feeder guppies often come from crowded conditions with a higher risk of carrying parasites and diseases. You’ll need about five adult guppies for every 20 gallons of your tank. Note that guppies are introduced a few days into the cycling process, so there’s no rush to acquire them immediately.
Each of these materials plays a crucial role in successfully establishing the nitrogen cycle in your aquarium, creating a healthy and stable environment for your axolotl.
Step-by-Step Guide to Establishing the Nitrogen Cycle in Your Aquarium
Following is a step-by-step guide on how to establish the nitrogen cycle in your aquarium for your exotic pets:
Step 1: Aquarium Setup
Prepare your aquarium with all decorations, filter running, and sand substrate, ideal for axolotls. The nitrifying bacteria will primarily colonize the filter media, with sand offering additional habitat. Remember, the bacteria grow best at temperatures between 65-85°F, with lower temperatures slowing the cycle and higher temperatures potentially harmful.
Step 2: Maintaining Optimal pH (7.2 – 8.4)
Ensure your aquarium’s pH is between 7.2 and 8.4. Low pH levels can kill nitrifying bacteria. If your pH is below 7, adjust it before proceeding. This can be done using limestone, coral, or household ammonia, which also raises the pH due to its basic nature. Regularly monitor and adjust the pH as needed during the cycling process.
Step 3: Introduce Fish Food
Lightly sprinkle fish food into the tank. This will decompose, producing ammonia and kickstarting the nitrogen cycle. Be cautious with the amount – excessive ammonia over 5 ppm can harm the bacteria. A small amount every couple of days is sufficient.
Step 4: Add Nitrifying Bacteria Starter Culture
Use a commercial starter culture containing Nitrosomonas and Nitrobacter bacteria, following the instructions on the bottle. These cultures also include the initial nutrients required for bacterial growth.
Step 5: Regular Water Testing
Test water quality daily during the cycling process and weekly thereafter. Initially, you should see elevated ammonia and possibly nitrite levels, with low nitrate levels. Once ammonia starts to drop below 1 ppm, you can move to the next step.
Step 6: Introducing Guppies
After the cycling process begins, add guppies – five or six adults per 20 gallons. Monitor their behavior closely for any signs of distress, which could indicate water quality issues.
Step 7: Patience and Monitoring
Continue testing ammonia, nitrite, and nitrate levels daily. The goal is to see ammonia and nitrite levels fall to zero and nitrates rise, indicating a successful cycle.
Step 8: Completing the Cycle
Once ammonia and nitrite levels are consistently at zero, your tank is effectively cycled. You can now introduce your axolotl to the tank. For smaller axolotls, remove the guppies to prevent any issues.
Step 9: Ongoing Maintenance
Maintain ideal water parameters through regular testing. Conduct partial water changes if nitrate levels exceed 30 ppm. Ideal water parameters are:
- Ammonia: 0 ppm (1 ppm or more of ammonia is deadly)
- Nitrites: 0 ppm (1 ppm or more of nitrite is deadly)
- Nitrates: 20 to 40 ppm (anything higher becomes toxic)
- pH: 7 to 8 (ammonia becomes more toxic at higher pH)
Following these steps will help you successfully establish a healthy nitrogen cycle in your axolotl aquarium, creating a safe and thriving environment for your aquatic pet.

